

Hanging Your Super Plak: A Step-by-Step Guide
1. Gather Your Tools
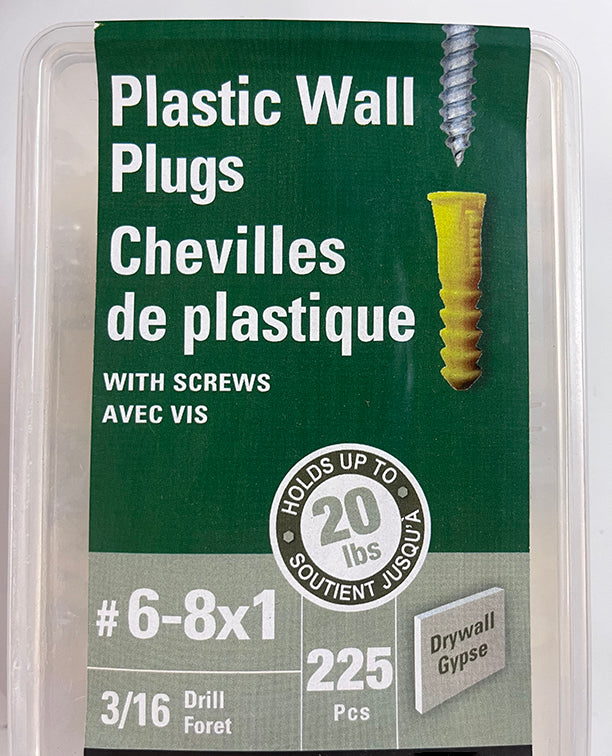
Before you begin, make sure you have the following tools ready:- A single #8 round screw that fits into the slot routed in the back of the plak
- A drill and a 3/16" drill bit
- A #8 round screw head
- A measuring tape
- A level
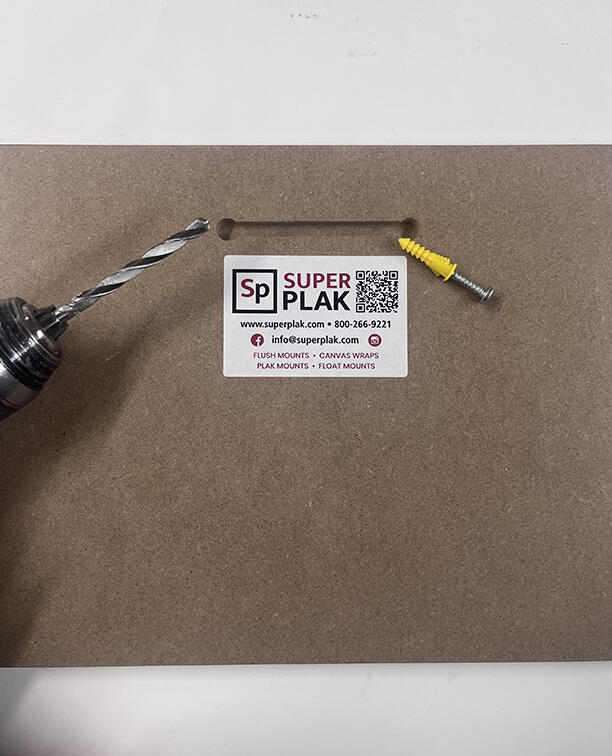
2. Locate The Slot
Turn your Super Plak over and locate the slot routed in the back. This slot is designed to accept a standard #8 round screw head, which can be easily found at any local hardware store.
3. Drill Into Wall
With your 3/16" drill bit, measure and mark the spot where you want to hang your plak, ensuring it's at the desired height and position. Add your drywall plug flush with the wall and screw in your screw, leaving enough room for your plak to slide on.
4. Hang Your Super Plak
Once the screw is securely in place, it's time to hang your Super Plak. Use the two holes on each side of the routed slot to easily apply the plaque onto the wall. Slide the plak horizontally until the nail is resting in the middle of the routed slot. Avoid hanging your plak in one of the two holes directly, as this may cause it to hang loosely and not be securely attached to the wall.
5. Make Adjustments
After hanging your Super Plak, use a level to ensure it is straight and adjust if necessary. Some minor adjustments may be needed to get the plak level and lying flat against the wall.
6. Removal Process
Should you ever need to remove the plak from the wall, follow these simple steps:- Slide the plak slightly so the nail sits into one of the two slots.
- Pull the plak away from the wall, and it will be easily removed without any hassle.
By following these steps, you can ensure that your Super Plak is securely and beautifully displayed for all to see. Enjoy showcasing your cherished memories with confidence and ease!
#SuperPlak On Instagram


